The other week I did a guest post over at
The T-Shirt Diaries if you missed it, here it is again! Enjoy!
* * * * *
Greetings Stashbusters! I'm so excited to be participating and grateful to Robin for hosting. I'm Emily from
Domestic Deadline and I see stashbusting as a way to take a different look at the supplies I already have on hand. If you haven't guessed by now, I hoard fabric. I can't pass up the remnant section at the craft store. To me remnants and scraps can be put together like a fabric puzzle. So, when my oldest asked for a bubble skirt
after September 1st, it had to be done from my
hoard stash! There are several bubble skirt tutorials out there, and mine really isn't all that different... except for the fact that the fabric that met her red, white and blue requirements were a quarter of a yard or less!!! This might work for a little one, but JuneBug, my 9-year-old is very skinny but fairly tall. I'd like to introduce my
Fat Quarter Reversible Bubble Skirt
1. Measure your recipient. JuneBug has a 21 inch waist (and has for at least 3 years) and I like a length of 17 inches for skirts on her. You will need 1 inch wide non roll elastic (waist size less 1 inch) and approximately 30 inches of 1/4 inch elastic (or in my case 1/8 inch was in the stash, went with it). I'm assuming basic sewing knowledge here, but if you have any questions please ask! My seam allowances are 1/4 inch

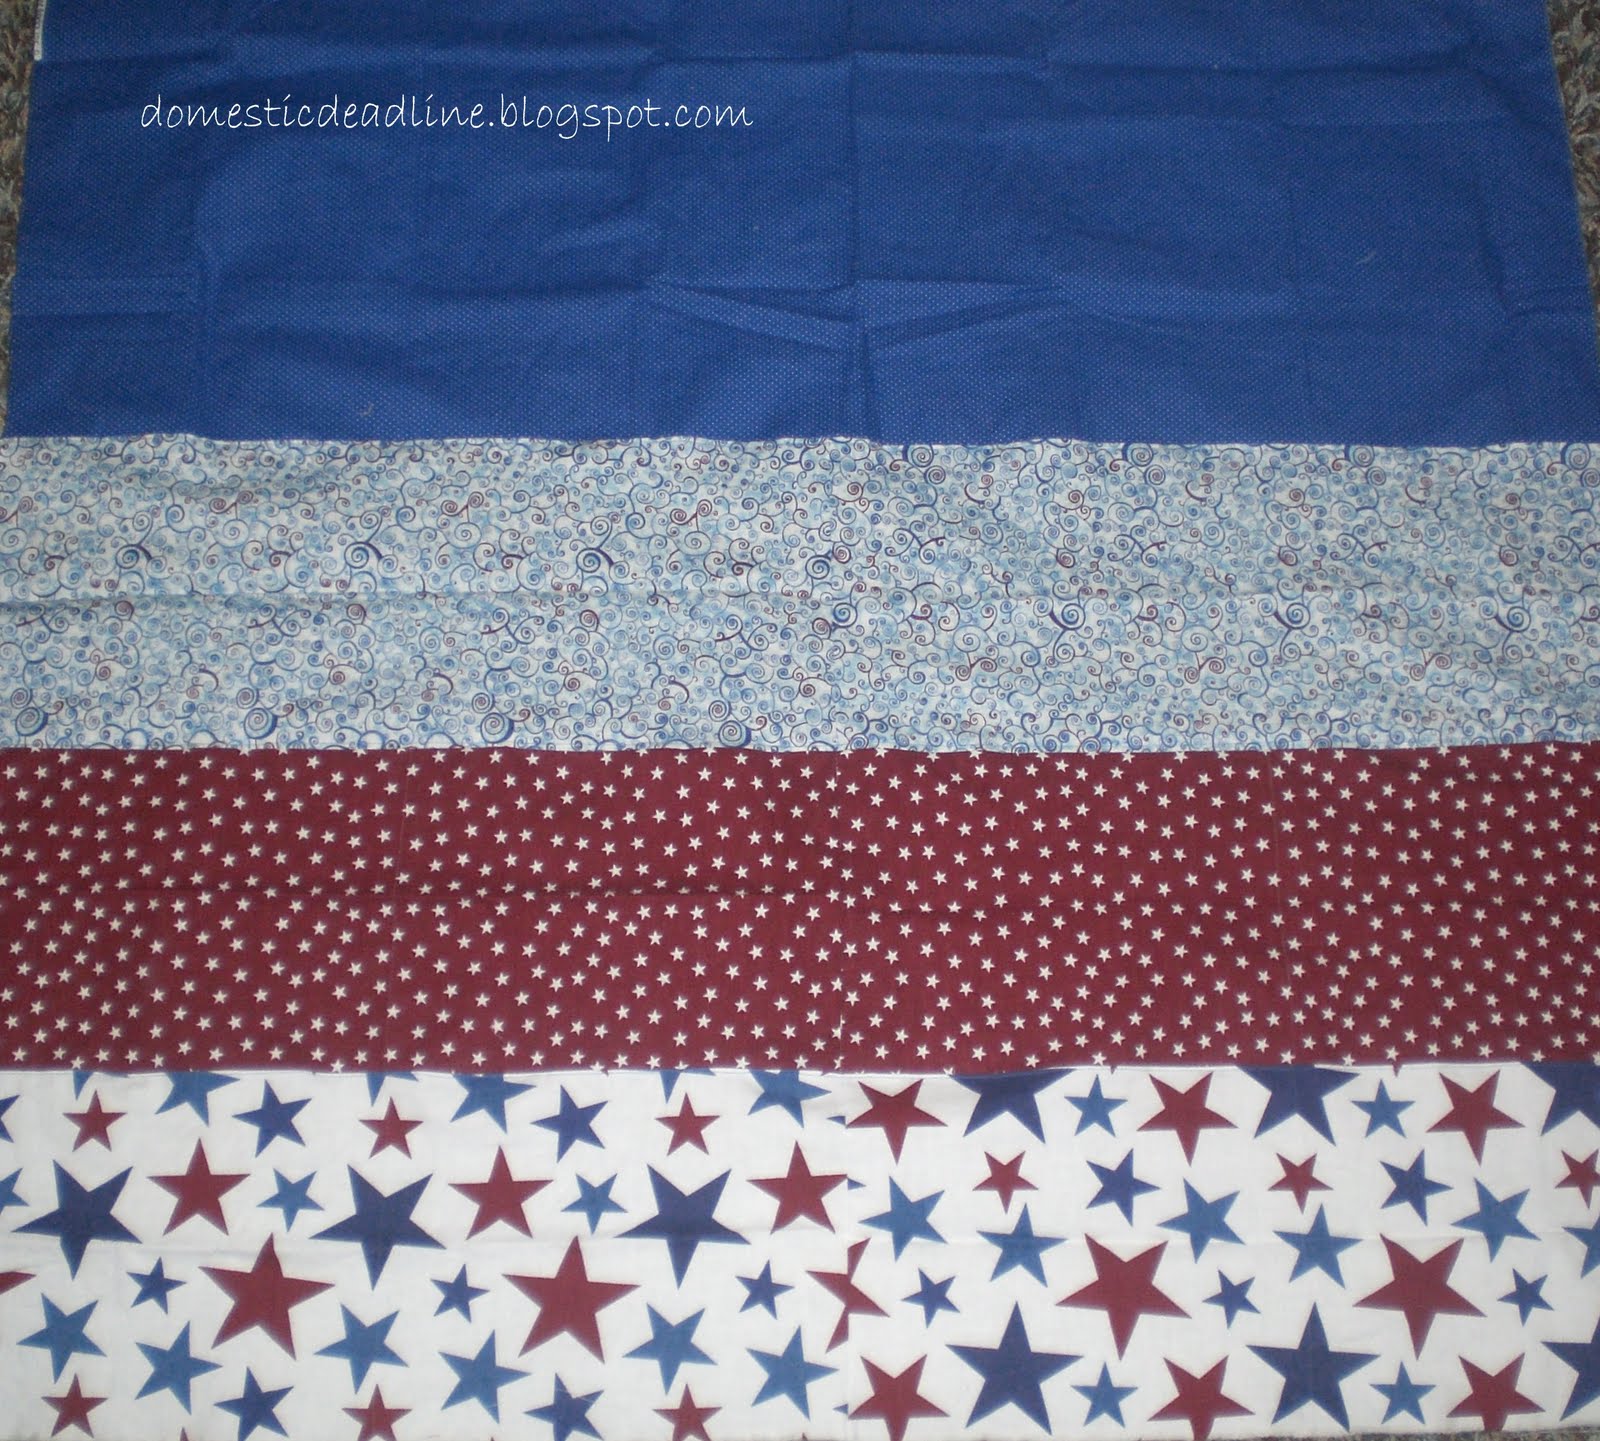
2. Grab a few fat quarters in coordinating colors, I wanted mainly blue on one side (her fav color) and patriotic on the flip side. When it comes to a traditional two color reversible bubble skirt I would use one piece that was standard width (about 44-45 inches selvage to selvage) with a length of 1.5 inches longer than my desired finished measurement (so for JuneBug, that would be 18.5 inches). The second piece would be 3.5 inches longer than the first (21.5 in my case) *Note 18.5+21.5=40. Sorry to be so wordy, but I figured I should explain the measurements so you understood how I pieced my fabric together.

3. Cut those fat quarters down and sew them back up! Fat quarters are typically 22x18 inches we need to turn them into about 44 inch long strips by whatever is left (would be about 9 inches, but apparently mine were partially used since I didn't have a full 18 inches, just go with it!). Once I had strips of fabric that were (almost) 44 inches wide (give or take a bit of seam allowance), I sewed them all together, resulting in a 43 by 40* inches rectangle. If you would like to top stitch, now is the time (yeah, just do it).
4. Now we're going to sew that baby into a tube, sorry the above picture was the best I could do to show this, my photography skills aren't pro.
5. Turn half of the tube onto itself, wrong sides in. The swirly strip will be the bottom band on BOTH sides, the star pattern is the waist on both sides. Iron a nice crisp crease into the bottom (my swirlies).
6A). Just above the bottom edge, on the right side, we're going to sew
almost all the way around (my scissors are acting as an arrow) wide enough to fit the 1/4 inch elastic. 6B). Since you sewed almost all the way around, there should be an opening to feed the elastic through with a safety pin. Please note, you have to reach in between the two layers since your finished piece will have no exposed raw edges. 6C). Once your elastic is all the way through, decide how much you want the "bubble" to gather and sew the ends together. Sew that opening closed.
7. Congratulations you are
almost done! The last step is the waist band. 7A). Fold over your waist band a quarter inch and iron. Then fold it down and iron again, this time about 1.25 inches, covering the raw edges. 7B). Stitch
almost all the way around again, making a casing for your waist elastic. Feed it through the opening, sew your elastic ends together and stitch the small opening closed.
8. You're done! If you work after the kids are in bed like me, leave it in her room to find it in the morning. After you relish in her excitement, don't be too disappointed when she
insists on wearing an old t-shirt with it,
refuses to brush her hair again and
just be glad she lets you take the pictures. (Ignore the random waffle holding arm that tried to work his way into your picture).
Peace be with you,

I'll be linking up to some of these parties, stop by and
check out the talent!
M: Made by you Mondays, Made with Love Monday, Making the World Cuter, MMM @ CRAFT, Just something I whipped up, Organizing Mission Monday, A Round Tuit, Motivate me Monday, Sharing Monday, Jam Hands T: Sew Cute Tuesday, Handmade Tuesdays, Tip Me Tuesday, TCB, Topsy Turvy Tuesdays, Take-a-Look Tuesdays, Too Cute Tuesdays, Giggles Glitz & Glam, It’s Sew fun Tuesday W: We Did it Wednesday, Night Owl Crafting, Sugar & Spice, Tea Rose Home, Upcycled Awesome, We’re Organized Wednesday, What I Wore Wednesday, What’s Up Wednesday, Wow Me Wednesday, Share the Wealth, T: Make
It Wear It, Frogs & Snails, It’s Stinkin’ Cute, Making it with Allie F: Fun Friday Finds, Fingerprints on the Fridge, It’s a Hodgepodge, Chic on a Shoestring,
Fantastic Friday, TGIF, I’m an Organizing Junkie, Spunky Junky, The Shabby Nest, While He Was Napping S/S: KISS, Funky Fresh, Weekend Wrap Up, Nifty Thrifty, Creative Bloggers


No comments:
Post a Comment